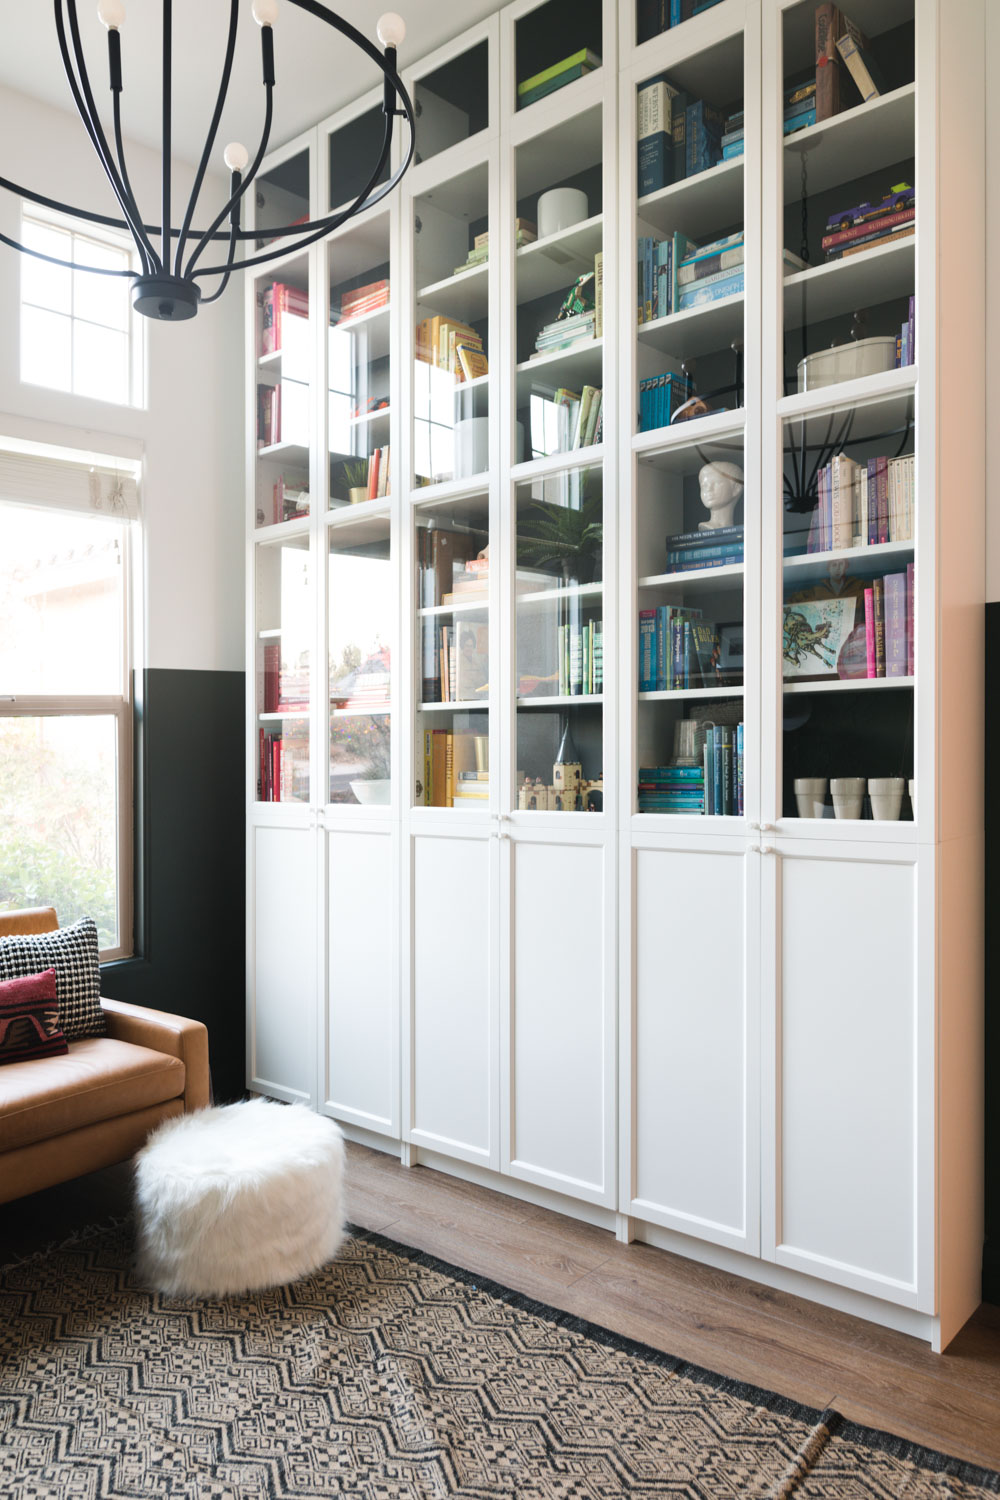
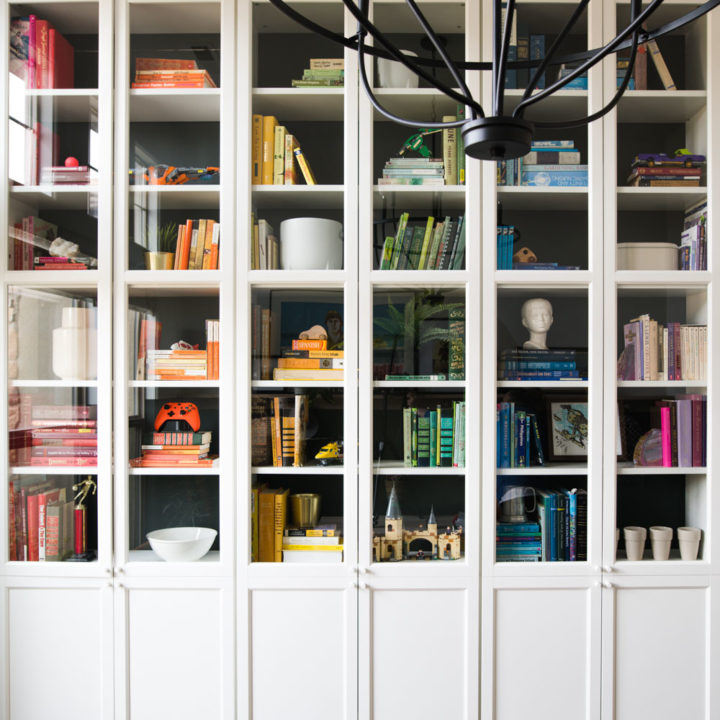
There are a few things that instantly make a room feel special and right. You know? Like BAM! Leveled up. Bookcases do that. Built in bookcases do it to the 100th degree. Today I’m going to show you how we took basic Billy Bookcases from IKEA and turned them into the most perfect built in you’ve ever seen.

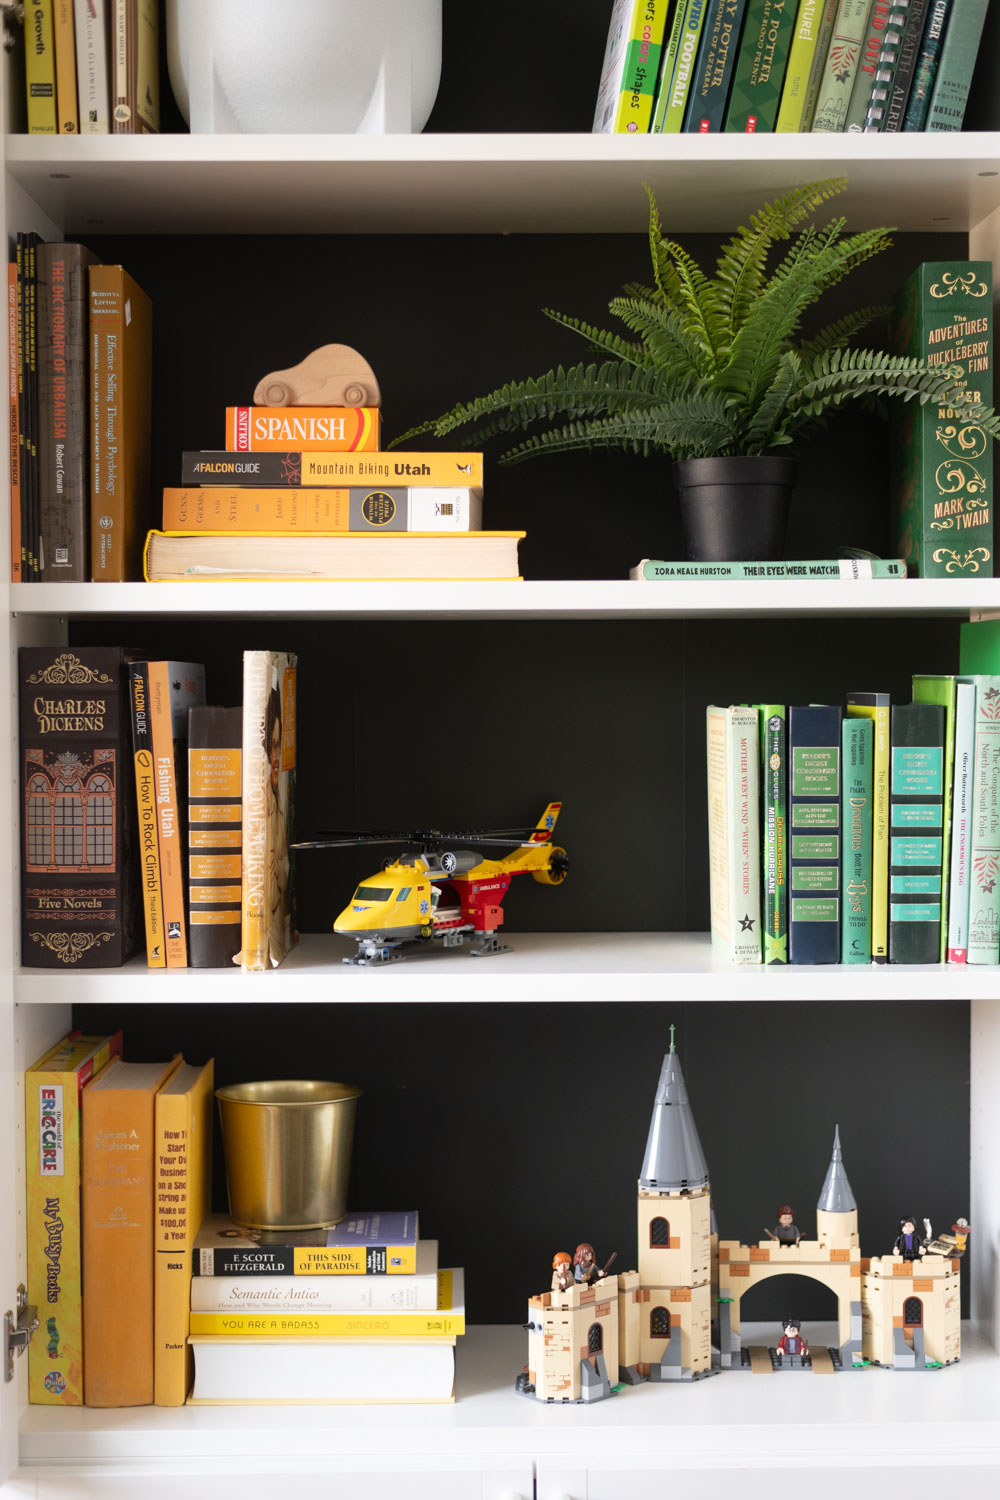
When I was designing the Clifford’s office/playroom I knew that we needed some serious storage. I think the default for storage is something with pullout bins right?! Like they are a playroom staple. But it also needed to be beautiful and so this was the best of both worlds! The lower cabinets with solid doors hold all of the boy’s toys and anything else Tash needs to stash, and the upper shelves with glass fronts give us the design element that we are looking for.
So let’s dive into what it takes to use Billy Bookcases to do floor to ceiling built-ins. The first thing that we (I say we because I am in this with you and also because I had to learn it myself!) is that these are not custom. They can be customized, but they come in set widths and heights, so they’re semi customize-able. It also means math is going to come into play in your life. IKEA has a bunch of different widths and heights available and your job is to figure out what combo will work best to give you what you are looking for!
THE 2 MOST IMPORTANT THINGS TO KNOW:
- IKEA Bookcases arent manufactured to be stacked like this. So USE THE BRACKETS. Every IKEA bookcase comes with a bracket that holds it tight against the wall. These are not optional in any way shape or form and need to be installed on every level of bookcase. If you dont use them you are setting yourself up for a very dangerous situation.
2. If you are stacking bookcases that are meant to be on the floor (meaning they have a kick plate) on top of other bookcases, you’ll have to cut that section off. Otherwise your doors wont line up correctly. I’ll give you the exact measurements to cut off later in the post, and a visual guide but keep that in mind as you are figuring out your heights.
Figuring out your height:
Measure your ceiling to floor all along the length of the wall. Typically the ceiling or floor isnt level, so it might be a different height from one end of the wall to the other (this was the case at Tash’s) If you dont take measurements in multiple spots you are setting yourself up for failure! The lowest number is the measurement you are going to work off of. (If you worked off of the highest then it will be too tall for the other end of the wall!)
Billy bookcases come in 3 heights. The tallest is 79.5″, the middle is 41.75″, and the shortest is an extender that is 11″. It’s a little bit of a game of mix and match to find out what is best. And keep in mind that you’ll need to cut 3.25″ off of the bottom if you are using a bookcase that has a kick plate on the bottom. (Basically you are cutting everything off below the bottom shelf).
For Tash’s 11′ ceilings, our combo looked like this, one extender, one 79.5″ and one 41.75″ for each column (we had 3 columns!)
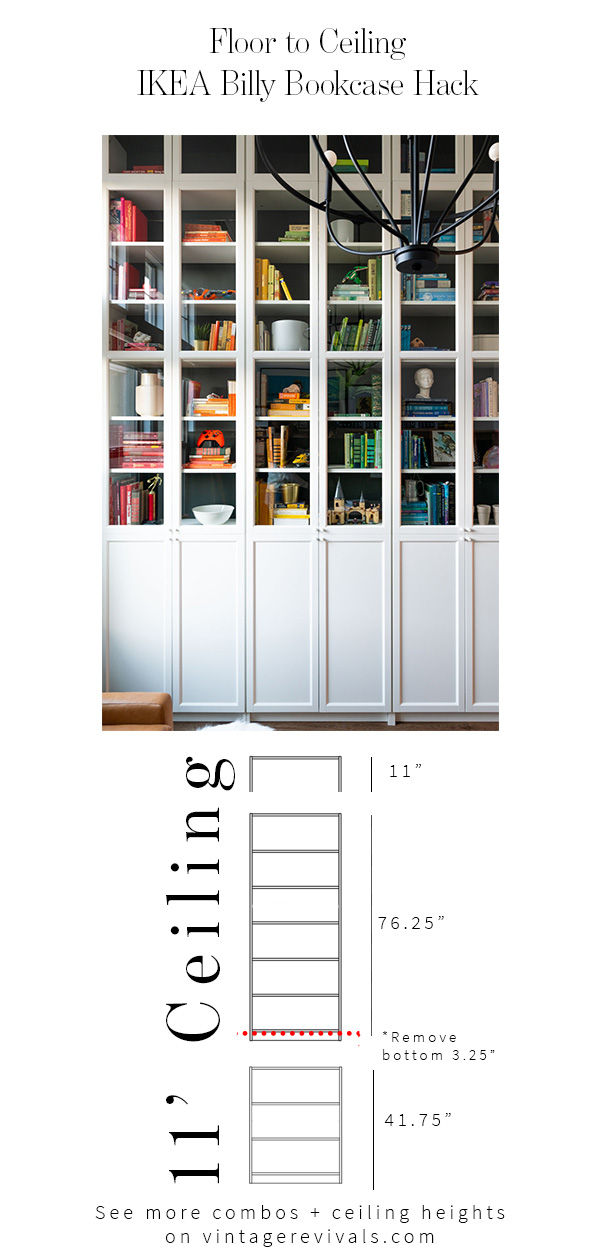
I’ve made you a cheat list though because I love you with my whole freaking heart and gave you the vertical combo for a few standard ceiling heights. These are all within 5″ of the ceiling, some closer, some further away. If your height is further away then you can add a piece of trim at the top and it will look like a million bucks!

If you are ending up with a gap that isnt working out, you’ve got a few options. You can take them as high as you can and call it a day. You can add moulding to the top to cover the extra few inches. You can modify the extender to shorten it, but you wont be able to use one of the doors (which may or may not be a big deal)
Figuring Out Your Width:
I wish that there were a few standard sizes that I could plug into a formula for you, but alas, you’re kind of on your own for this one. The good news is that IKEA has different widths and you can mix and match to make them work as well! And dont sweat it if your bookcase doesnt reach exactly wall to wall. You’ve got a few options! Rock the “It’s close enough” attitude like we did. Our bookcases didnt reach end to end and I was totally ok with it! As long as it’s centered on the wall you’re golden! You can add trim pieces along the edges (there are a million tutorials on trimming them out!)
Billy Bookcases are engineered to work with the extender (the 11″ size) and have dowels and everything you need, Allen wrench ready. They arent manufactured to work with larger sizes so that’s where we get creative.
Trimming Your Bookcase:
I know we’re only 800 words into this blog post and I’ve already brought it up a few times, but this part is super important. If you dont trim your bookcase down, it’s going to look like stacked bookcases that arent meant to be stacked. Cutting IKEA furniture is super easy, there is just one trick you need to know. Painters tape is your best friend.
The lacquer finish on IKEA pieces can chip pretty easily when you are running it through a table saw (or using any other saw!) All you need to do to prevent chipping is to put down a piece of painters tape so that the saw blade cuts through it.
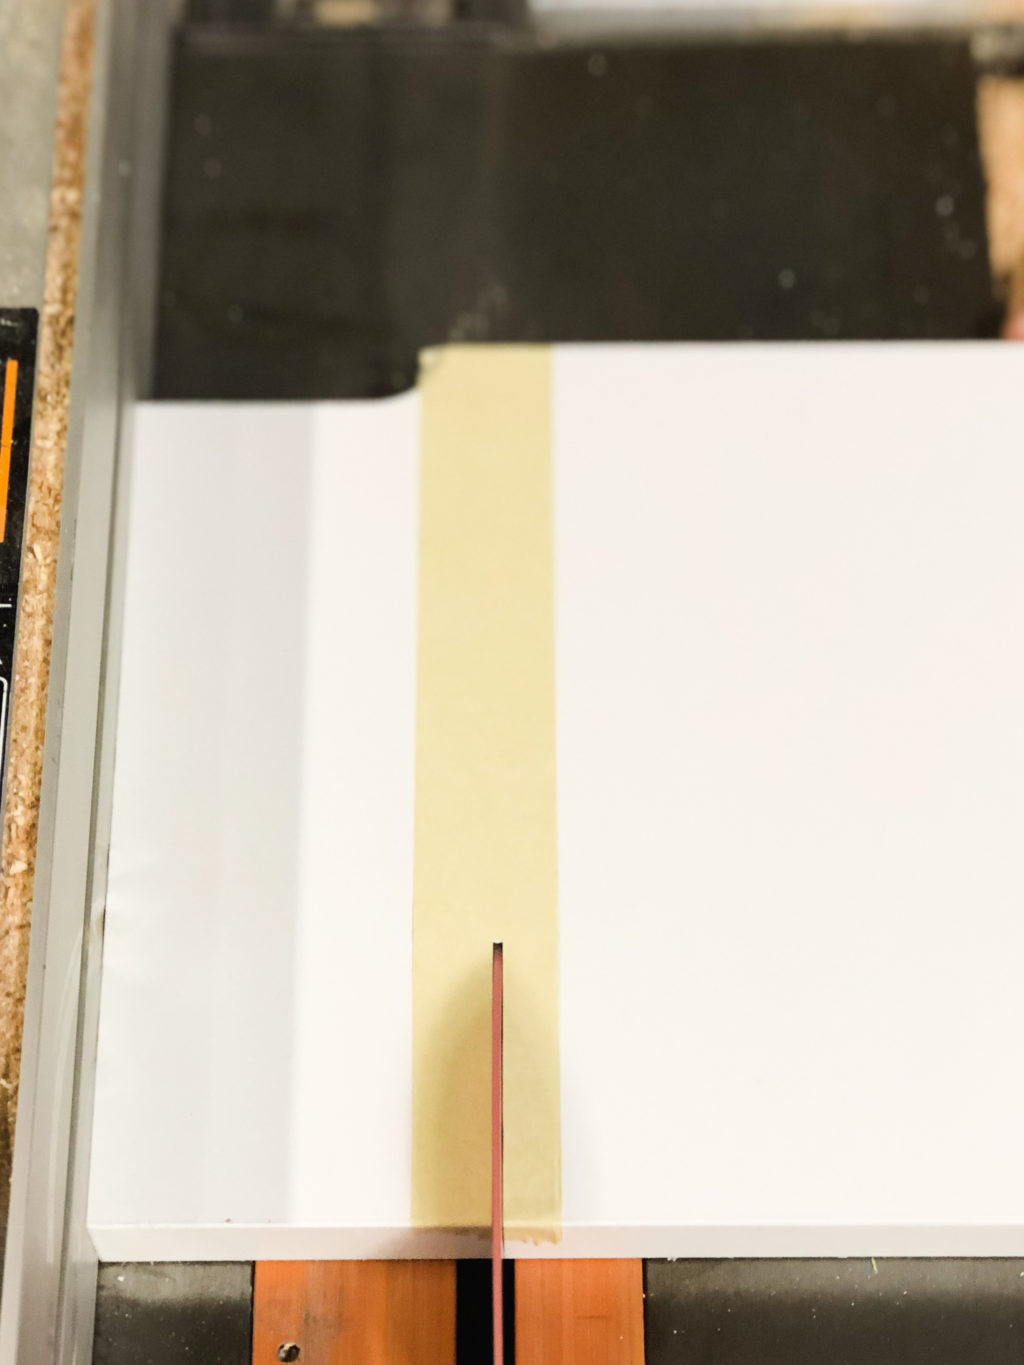
It works like magic every time!
You will also need to trim 1/2″ off of your back piece. It doesnt run all the way to the bottom of the bookcase sides, that’s why the measurement is different and something we learned the hard way. YAYYYyyyyyy.
If you are painting the back piece of your bookcase like we did, now is the time! Make sure you do this before you install it, its 100x quicker and looks nicer! I’ve got a killer tutorial on painting furniture if you need tips on that!
Assembly:
Assemble all of your bookcases and have them ready to go! For the bookcases that you cut the bottom off of, you can assemble everything but the base will still be open, similar to the extender pieces. When everything is assembled it’s time to start stacking!
Stacking and Securing:
Start by putting the extender pieces on top of your bookcase. This is easier to do without worrying about the ceiling height (especially if it was a close fit like ours!)
Move the middle (if you’ve got a middle!) base into place on the wall and center it.
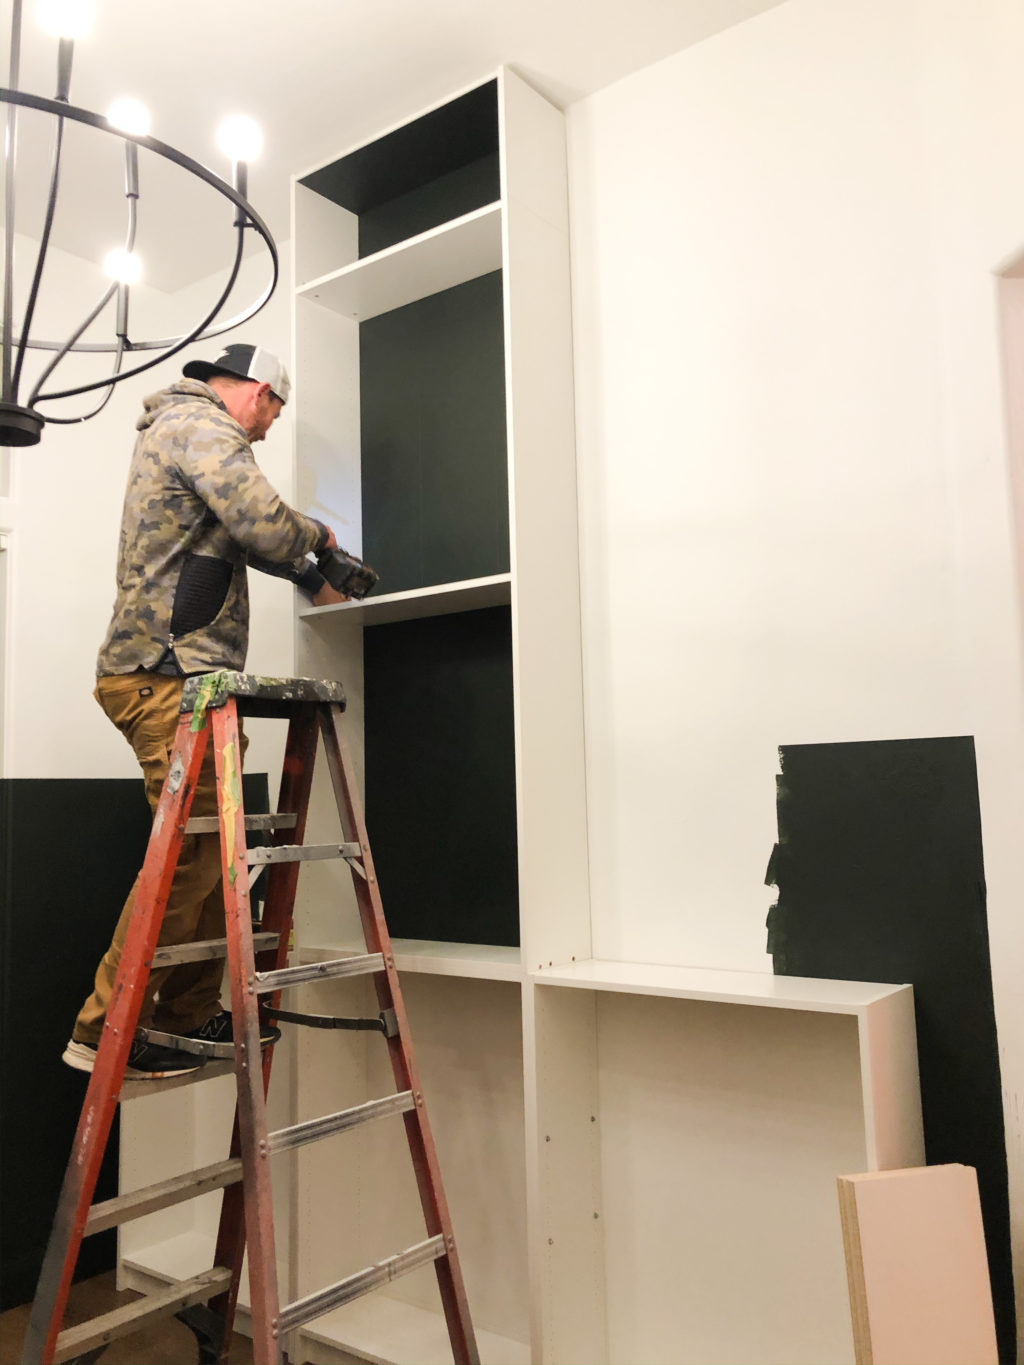
Lift the larger bookcase on top of the base (remember the bottom of this bookcase is still open). Fit the cross shelf inbetween the sides and make sure that they line up with the sides of the base bookcase. Using wood screws, screw in through the side of the bookcase, into the cross piece. (Now if you lifted the upper bookcase up it would have a bottom.) This will give you 2 horizontal pieces right on top of each other, one that is the top of the base, and one that is the bottom of the upper. (You wont notice it at all once the doors are installed!) Screw up through the underside of the top of the base into the second piece in all 4 corners and in the middle. This will secure your upper bookcase to the lower. Add your wall brackets and make sure that you are putting them into studs!
We repeated this for the other 2 bookcases, the only difference was with the end that was visible from the doorway. Instead of screwing in from the sides, we went up at an angle and caught the side. This made is so that there werent any visible screws.
Check out this timelapse of the whole thing being assembled!
It’s also really important to secure the bookcases to each other. Once they are stacked and in place, screw from the inside of one bookcase into the other to attach them together. Do this multiple times along the height of the shelves.
Attach the other brackets securing the bookcases to the wall and you are almost done!!
Just add the shelves (before the doors, it’s a million times easier!!) Follow IKEA’s instructions for the door install (it’s super easy) and you are done!!
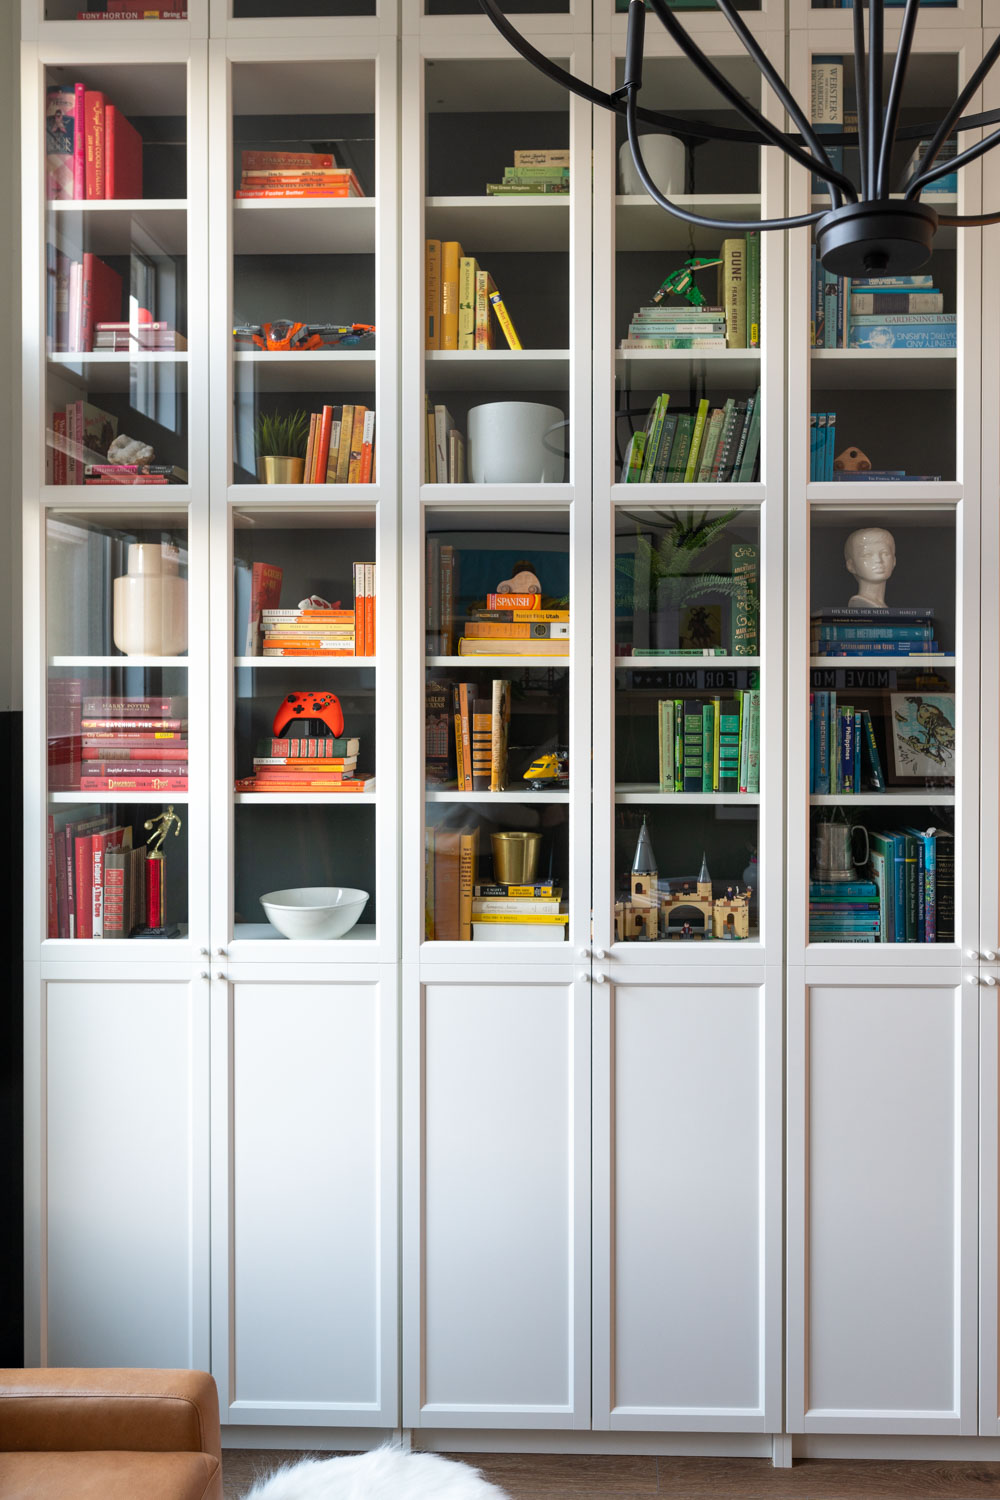
I want to do this in every room of my entire life. The total cost for our wall of built-ins was just over $900. Not the cheapest thing on the planet, but incredibly less than customs!
Any questions? Leave them below and I’ll update the post with answers! Check out the rest of the projects in the makeover below!
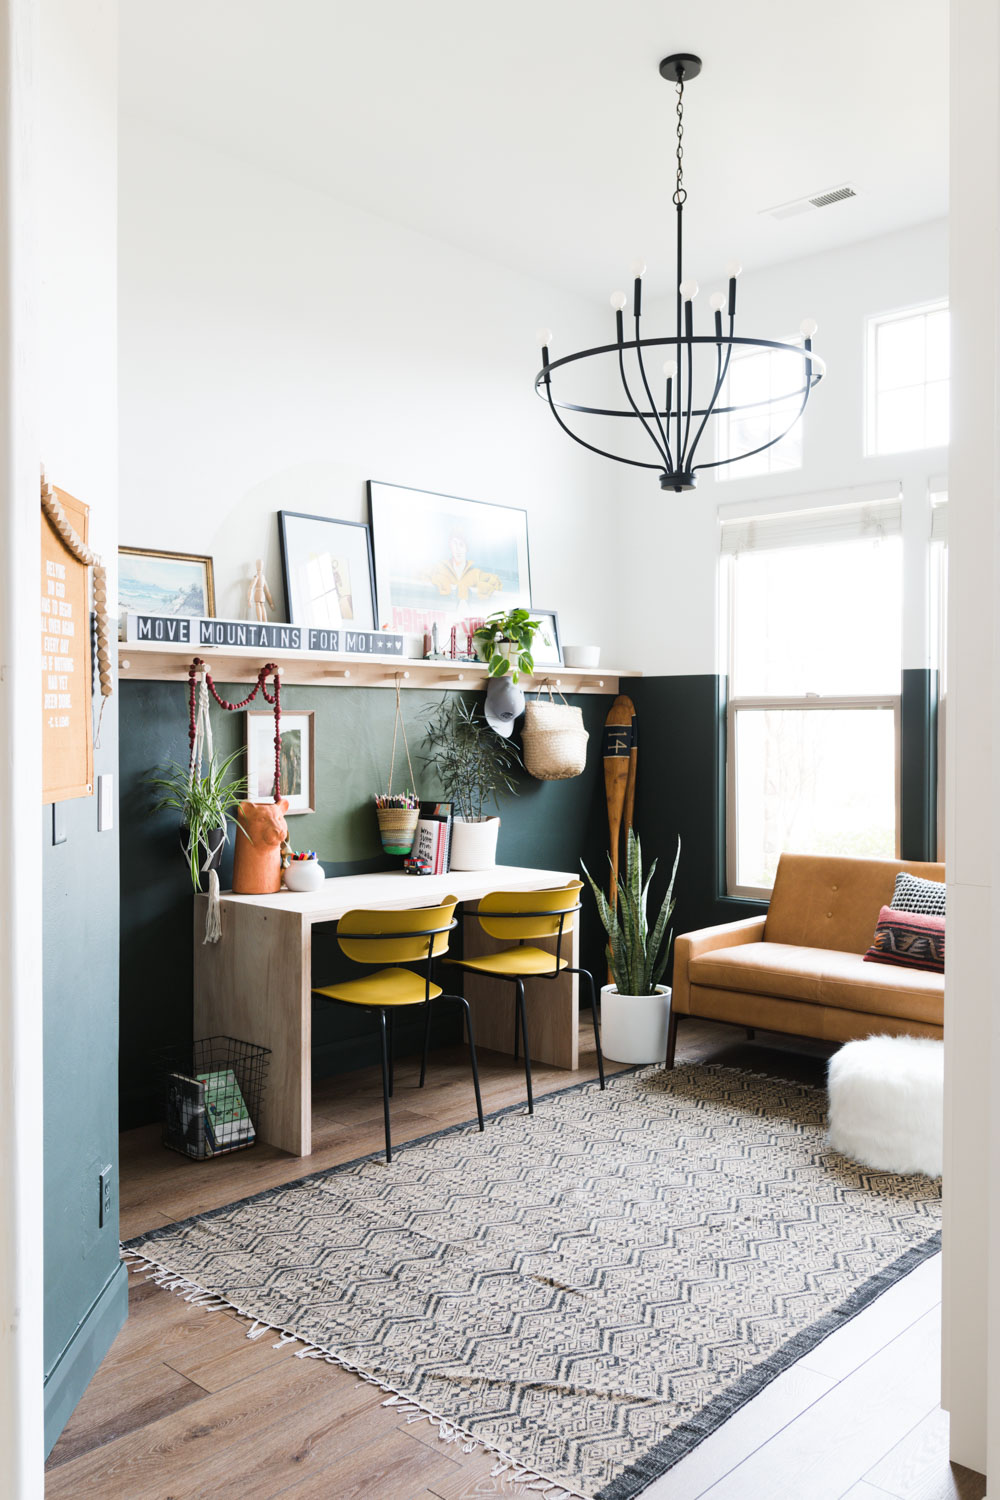
Kid-Friendly Office
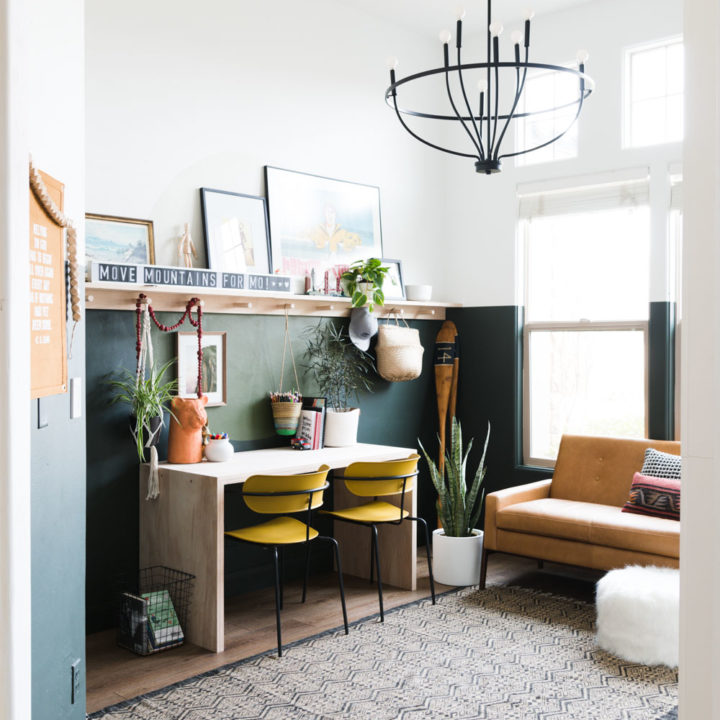
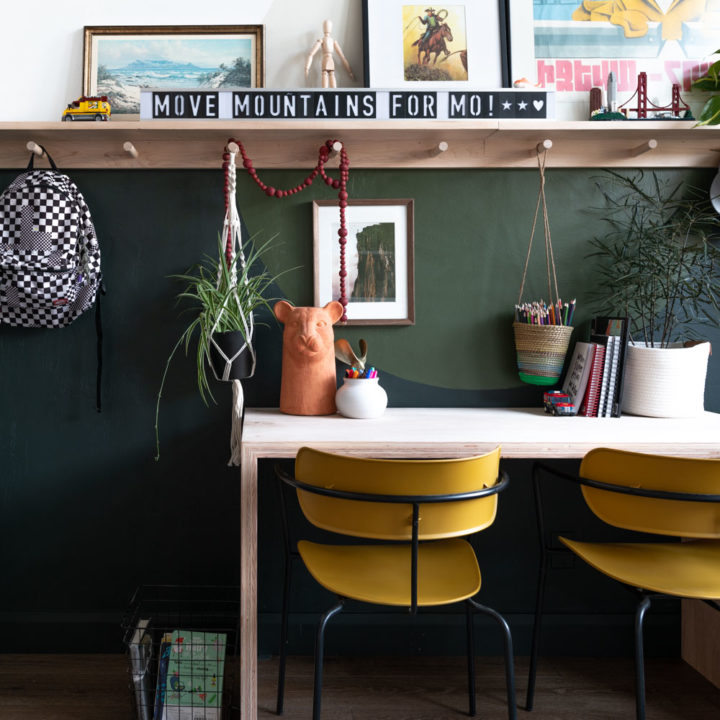
30 Minute DIY Peg Rail + Picture Ledge
This is fantastic. Thanks for the tutorial.
I love the black background to your bookcases! Did you paint them? Thanks!
Love how this turned out! So whif you do this again, will you use the kreg jig for the ends instead of screwing up at an angle?
sigh – I hate typos! I first typed “if” but then wanted to change it to “when” but ended up with “whif”